Creating rooms
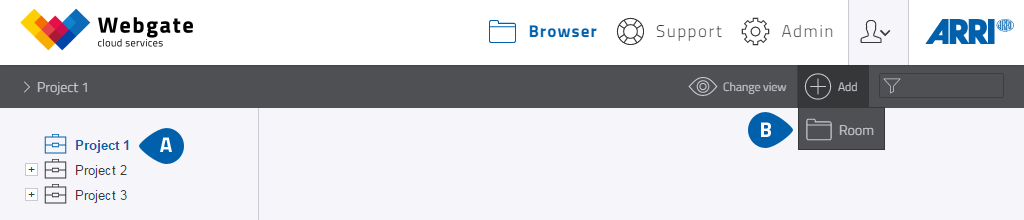
- To create a "Room", first click on the project in the Browser screen.
- Click on "Add" then "Room".
-
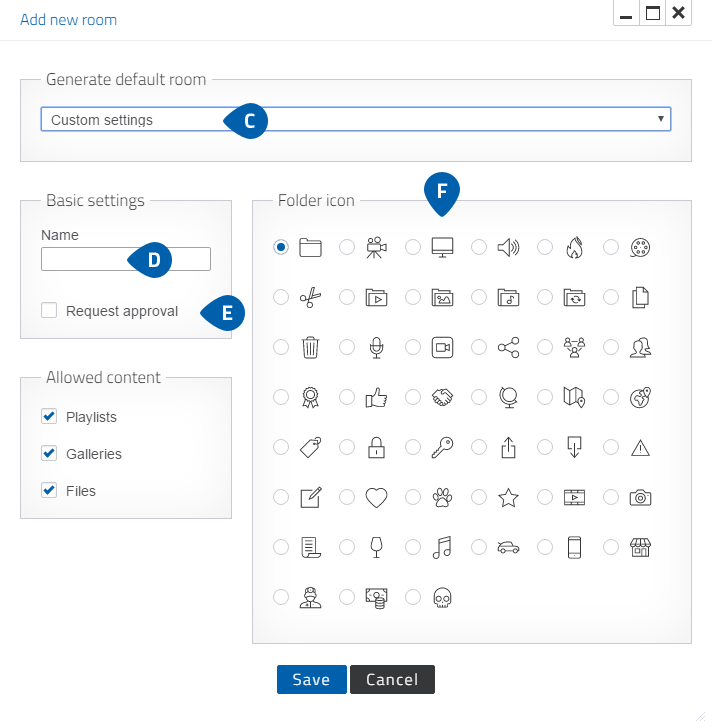
You can select a standard room that disposes over predefined icons and preselected, permitted content. You can
also change the icon and the permitted content if you wish.
Please note you cannot change the permitted content afterwards once you have made the setting.
- You can name the room.
- You can request approval. If you put a tick in this box, all items uploaded to the room are in gray for users with the “approve” permission (i.g. room administrator), and invisible for users without this authorization (i.g. member and user). Unapproved items can be approved later if required. The room setting "Request approval" can be changed later in the project settings.
- You can choose an icon for the room, and change it later in the Browser.
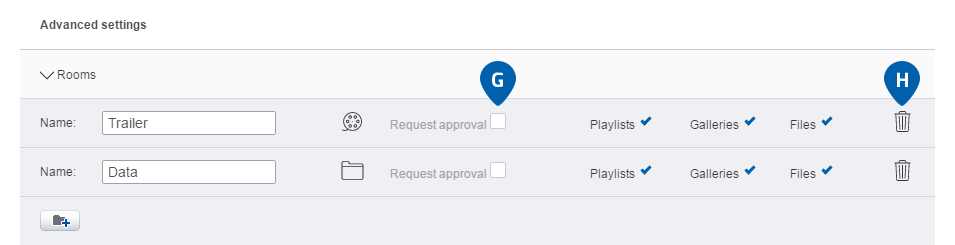
- The "Request approval" setting can be changed in the project settings later. Click on the context menu next to the project in question. Open the "Rooms" item and untick "Request approval".
- To delete a room, click on the trash can symbol on the right. Please note that it can take some time for a room to be deleted.